You have decided to repipe. Maybe the leaks finally added up, maybe the water runs rusty, maybe your insurer flagged the old pipes. Whatever brought you here, the next question is the one that makes people nervous: what is this actually going to be like? Will my walls be torn open? How long is the water off? Can I stay in the house?
The good news is that a modern repipe is far less disruptive than most homeowners expect. Here is the full step-by-step process, a realistic timeline, and what to do before the crew arrives, so nothing about the project catches you off guard.
The Process at a Glance
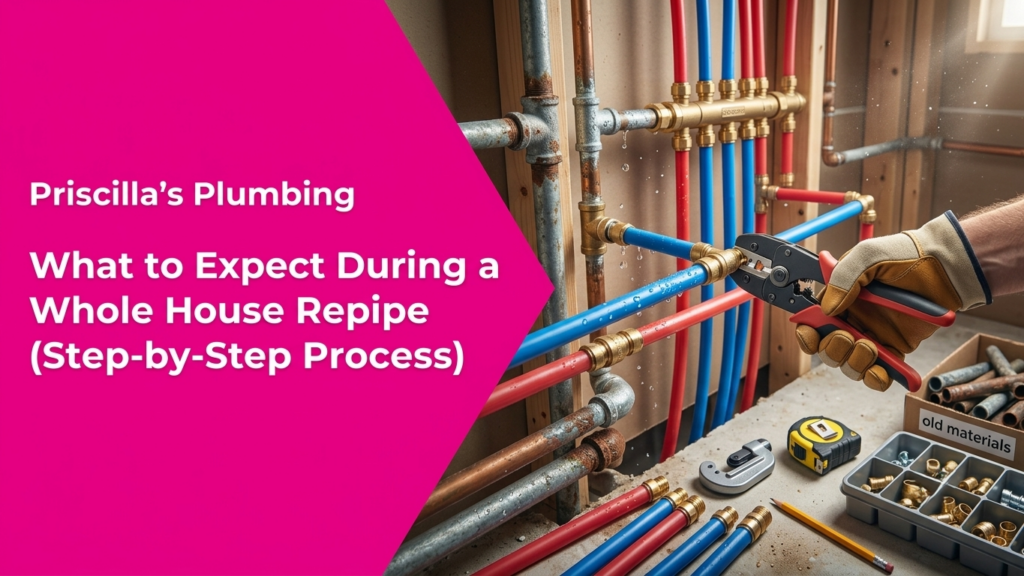
A whole-house repipe replaces your home’s water supply lines with new material, almost always PEX in Florida. The project moves through six clear phases:
- Consultation and assessment
- Preparation and protection
- Cutting access points
- Installing the new pipes
- Pressure testing and municipal inspection
- Drywall patching and cleanup
Most standard South Florida homes complete the plumbing work in 2 to 3 days, with drywall finishing following after the inspection passes. You can usually stay in your home the entire time.
Step 1: Consultation and Assessment
Every repipe starts with a plumber walking the home. This is not a formality; it sets the entire plan.
During the assessment, the plumber will:
- Inspect your visible pipes, fixtures, and known problem spots
- Confirm the pipe material and age
- Count fixtures (every sink, toilet, tub, shower, hose bib, and appliance is a tie-in)
- Check whether your home is on a slab and how the lines will be routed
- Map the most efficient path for the new pipes, often running them parallel to the old ones
You will get a written, itemized estimate from this visit. A good one lists materials, labor, permits, and drywall patching separately so you know exactly what is included.
Step 2: Preparation and Protection
On installation day, before any cutting begins, the crew protects your home.
- The main water supply is shut off
- Floors, furniture, and walkways are covered with protective sheeting to contain dust and debris
- The plumber marks the drywall sections that need cutting, usually in low-visibility spots like under sinks, behind toilets, and in utility areas
This prep is what keeps the rest of your home clean while work happens in targeted zones. A crew that takes protection seriously is a good sign that you hired the right one.
Step 3: Cutting Access Points
To reach pipes hidden inside walls and ceilings, the plumber cuts small, strategic openings in the drywall. This is the part homeowners dread, but it is more controlled than it sounds.
A few things worth knowing:
- The cuts are deliberately small and placed for access, not random demolition.
- PEX needs far fewer openings than copper, because its flexibility lets the crew snake it through wall cavities and around obstacles with minimal cutting.
- Expect noise during this phase; cutting, drilling, and pipe removal are loud, so plan around work hours if you work from home.
Old galvanized or cast iron pipe is removed and disposed of properly. With galvanized, especially, full removal matters, since leftover rusted sections would defeat the purpose of the upgrade.
Step 4: Installing the New Pipes
This is the core of the project. The crew runs the new PEX lines through the wall cavities and floor or ceiling joists, connecting to every fixture and appliance.
They then tie the new distribution system into:
- The main water supply line as it enters the home
- The water heater
- Each fixture, typically with new shut-off valves and supply lines
Because the lines often run parallel to the old ones, the routing is efficient and the disruption stays contained. PEX installation moves faster than copper, which is a large part of why most Florida repipes finish in a few days.
Step 5: Pressure Testing and Municipal Inspection
Before anything gets closed up, the system is verified.
Pressure testing: The plumber pressurizes the new lines and checks every connection for leaks. Nothing gets sealed behind drywall until the system holds.
Municipal inspection: This step is easy to overlook but important. A repipe requires a permit, and your local jurisdiction sends an inspector to sign off that the work meets code. A reputable company schedules and handles this for you, and insists on it, because it protects you legally and confirms the work was done right. Skipping the permit is a red flag that can cause problems when you sell the home.
Only after the inspection passes does the drywall get closed.
Step 6: Drywall Patching and Cleanup
With the new system approved, the crew patches the access holes, installs drywall patches, tapes, muds, and texture-matches the repairs so they are paint-ready. They haul away the old pipe and debris and return the home to order.
Here is the realistic expectation most articles skip: the base quote usually covers patching to a paint-ready state, not final painting or specialty finishes. If your walls have a specific texture, custom paint, or tile and flooring that gets disturbed, final restoration is often a separate cost. Some companies offer painting for an added fee. Ask exactly where the patching stops and the finishing begins before you sign, so the final look is not a surprise.
How Long Does a Whole-House Repipe Take?
For most standard South Florida homes:
- Plumbing work: 2 to 3 days
- Drywall patching: 1 to 2 days after the inspection passes
- Larger or complex homes: up to a week or more
During the plumbing phase, water is typically shut off only during working hours, roughly 8 a.m. to 5 p.m., and restored each evening. That means you have running water overnight and can stay in your home throughout the project in most cases.
How to Prepare Before the Crew Arrives
A little prep makes the days go smoother:
- Clear access to walls, sinks, and the water heater. Move furniture and clear under-sink cabinets ahead of time.
- Take down wall items near the work zones, art, mirrors, and shelves.
- Plan your water-off hours. Fill a few jugs for daytime drinking water and run the dishwasher or laundry the night before.
- Make arrangements for pets so they are safe and out of the work area.
- Decide on painting up front. Know whether you are handling the final paint yourself or paying the contractor.
Why the Process Goes Smoother in Experienced Hands
The difference between a clean repipe and a stressful one is the crew. An experienced team makes fewer, smaller cuts, protects your home properly, handles the permit and inspection without you chasing it, and texture-matches patches so the repairs nearly disappear. Priscilla’s Plumbing handles repipe projects across Oakland Park, Fort Lauderdale, and the surrounding Broward area, manages the permitting and inspection, and is available 24/7 throughout your project.
FAQ
How long does a whole-house repipe take?
Most standard Florida homes take 2 to 3 days for plumbing, plus 1 to 2 days for drywall patching.
Can I stay in my home during a repipe?
Yes, usually. Water is shut off only during work hours and restored each evening.
Will the plumber cut holes in my walls?
Yes, small strategic access holes, then patch them. PEX requires far fewer cuts than copper.
Does a repipe include drywall repair?
Patching to a paint-ready state is usually included; final painting and specialty finishes often cost extra.
Is a permit and inspection required for repiping?
Yes. A repipe needs a permit and a municipal inspection to confirm the work meets code.
How long is the water shut off during a repipe?
Typically, only during working hours each day, with water restored by evening.
What should I do to prepare for a repipe?
Clear access to walls and sinks, remove wall items, plan water-off hours, and secure pets.